Overview
This article describes numerous settings located in the Profile Settings and Preferences menus within iCIMS Text Engagement. Licensed Text Engagement users can update their contact information, configure settings for candidate messages and system notifications, and create response templates. Additionally, managers and customer admins can configure various company-wide settings and complete the company’s 10DLC Registration form and UK Regulatory Bundle, if needed.
Notes:
This article is composed of two main categories, covering the settings within each of the corresponding menus:
Users can access these menus by clicking the user dropdown (indicated by their name) in the upper right corner of the system.
Note: A user’s role (displayed in the Account Status panel on the dashboard) determines which of the settings in this article they have access to. Many of the settings introduced below are only available to users with the Manager or Customer Admin roles. For more information about Text Engagement roles, review the Getting Started with iCIMS Text Engagement article.
Profile Settings
The settings in the Profile Settings menu are broken down into the following sections, described below:
Profile Settings
Users can update their contact information in the following fields within the Profile Settings section of the Profile Settings menu:
- First Name
- Last Name
- Contact Phone Number
- Note: This is a user’s personal or work phone number and is not used for messaging candidates through Text Engagement; this number is used for users' SMS reminders for calendar items.
- Time Zone
Note: Users are unable to edit the following fields in this section:
- TextRecruit Number: A user’s unique Text Engagement phone number used for messaging candidates through the system (i.e., this number is visible to candidates). An icon displays next to the number with the flag of the country that corresponds with its area code.
- Email: A user’s email cannot be updated because it is used as the Text Engagement account’s primary login identifier. A system admin should contact iCIMS Technical Support if a user requires an email update.
Message Settings
Users can edit the settings described below within the Message Settings section of the Profile Settings menu.
- Voicemail Message: This is the greeting that candidates hear upon calling a user’s Text Engagement number. A user can customize their greeting by entering their message in the Voicemail Message text box, then clicking the Save button below the Notification Settings section.
- Notes:
- This message reads in a computer-generated voice, so it should be kept simple and straightforward.
- The default message that reads when the Voicemail Message text box is left blank is Thank you for calling. Please leave a message at the tone.
- The voicemail message reads regardless of whether voicemail is enabled or disabled. The message is not read, however, if call forwarding is enabled (described later in this section).
- Disable Voicemail: Toggling this setting on allows a user to disable their Text Engagement voicemail (i.e., candidates who call the user’s Text Engagement number cannot leave messages). By default, Disable Voicemail is toggled off, which allows candidates to leave voicemails for the user.
- Notes:
- Voicemails left by candidates display within their conversation history with a play button for users to listen to the message. Additionally, notifications are emailed to users when they receive new voicemails at their Text Engagement number.

-
-
-
- Tip: Selecting the three dots to the right of the volume icon allows users to download the voicemail.
- To ensure a positive candidate experience when disabling voicemail, it is recommended that users enable call forwarding (described below) or customize the Voicemail Message text box to encourage candidates to text their replies.
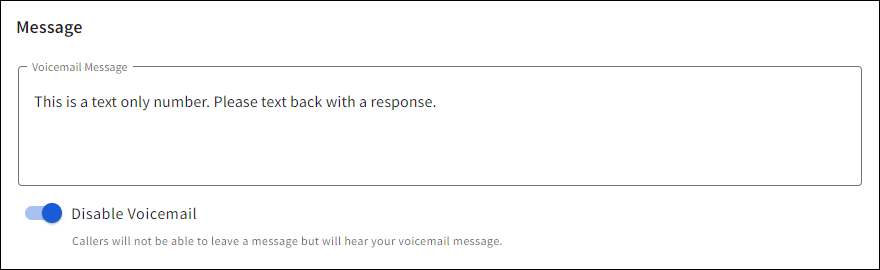 This image displays the configuration of a disabled voicemail where a caller is greeted with, "This is a text only number. Please text back with a response."
- Automatic Text Response: This setting allows a user to provide a message (e.g., an out of office message) that is automatically sent to candidates when they initially reply to the user’s Text Engagement number.
- Notes:
- Users should not set an automatic text response if they plan on normally interacting with candidates.
- Separate automatic text response messages can be configured when creating campaigns so that they are unique to each campaign. For more information on campaigns, review the Text Engagement: Creating a Campaign article.
- Duplicate Message Blocking: This setting prevents duplicate messages from being sent to candidates within a 24-hour period. If a user schedules a message that exactly matches a text a candidate received from any user within the past 24 hours, the duplicate message is not sent, and an error message displays in the candidate’s conversation history.
- Note: This setting only blocks messages sent via the Schedule Message popup. A user can still send a duplicate message through the quick response text box available on candidate profiles or in candidate conversations within their inbox.
Notification Settings
As candidates respond, notifications for unread messages display in three locations by default:
- Over the Notifications (bell) icon in the upper right of the system
- Next to the My Inbox tab on the sidebar menu
- On the Text Engagement browser tab
In addition to the in-system notifications, users can enable the notification options described below within the Notification Settings section of the Profile Settings menu.
- Desktop Notifications: These notifications display a preview of candidate responses on the user’s desktop. To enable desktop notifications, a user toggles the Desktop Notifications Enabled setting on. Then, a confirmation popup launches in the browser requesting this permission; click Allow on this popup, then click Save.
- Unread Message Notification: A user can enable a daily unread message notification email or text sent to their contact phone number (entered in the Profile Settings section). To enable the unread message notification, select either Email or SMS Text Message and then click Save. A selection of None indicates that the user will not receive daily email or text notifications.
Change Password
A user can update their password from the Change Password section of the Profile Settings page; review the Changing or Resetting Your Text Engagement Password article for more information.
Preferences
Users can access the Preference Settings page by clicking the user dropdown in the upper right corner of the system, then selecting Preferences.
The settings in the Preferences menu are broken down into the following sections, described below:
User Response Templates
Within the User Response Templates section of the Preference Settings page, users can create and manage response templates for their own quick use when sending messages from anywhere in Text Engagement.
Templates can be used to personalize messages using Mail Merge functionality to automatically add candidate names, deliver consistent messages to candidates, and always include user signatures. Recruiters save time using templates, as they do not have to repeatedly type out the same details in their messages.
To add a template, click the plus icon in the top right of this section to launch the Add Template popup. On the popup, enter a template name and message, then click Save.
To edit an existing template, select a template from the list to launch the Edit Template popup, then make edits to the name or message body, and finally click Save. To delete a template, select the template from the list and click Delete on the Edit Template popup.
Notes:
- User response templates can be accessed only by the user who created them. These templates cannot be shared with other users.
- When users save templates from the Schedule Message popup, those templates can be accessed only for scheduled messages by the author of the template or any users it was shared with. Scheduled message templates do not display in the User Response Templates section of the Preference Settings page.
Shared Response Templates
Managers and customer admins can create and manage templates within the Shared Response Templates section of the Preference Settings page.
Note: If a manager is assigned to a team, any shared response templates they create are available only to members of their team. To create a shared response template that is available to members of all teams, it must be created by a manager who is not assigned to any team.
Automated Scheduling Calendar
Within the Automated Scheduling Calendar section of the Profile Settings page, a user can sync their Text Engagement accounts with the Text Engagement calendar (default) or a Google or Microsoft calendar to automate calendar scheduling with candidates and configure availability options. For more information, review the
iCIMS Text Engagement: Connecting and Using Automated Scheduling Calendars article.
Working Hours
The Working Hours section of the Preference Settings page can be used to set available working hours for candidate scheduling when the Text Engagement calendar is connected via the Automated Scheduling Calendar section. Users can select the applicable dates and times for their availability for candidate scheduling, then click Save to update their availability.
Note: Scheduling availability configured via the Working Hours section does not apply to scheduling with users connected to a Google or Microsoft calendar in the Automated Scheduling Calendar section; their availability can be managed separately on their external connected calendars.
Company-Wide Opt-Out Message
The Company-Wide Opt-Out Message Option section of the Preference Settings page contains the Initial Opt-Out Message setting that allows managers and customer admins to select whether the company-wide opt-out message will be the iCIMS-provided default opt-out message or a customized company opt-out message.
The Company-Wide Opt-Out Message Option section of the Preference Settings page also contains the Allow Override of Opt-Out Message setting. This setting can be toggled on by managers and customer admins to allow all users the option to choose between using the value of the company-wide Initial Opt-Out Message setting or customizing a unique message for their individual Text Engagement number. For organizations with the teams feature enabled, this setting also enables team-wide opt-out messages.
iCIMS Text Engagement always sends an opt-out message to a candidate profile the first time that candidate profile is contacted by any user at any organization. For more information on these settings and this functionality, review the iCIMS Text Engagement: Introduction to Candidate Opt-Out and Resubscribe Messages article.
Company-Wide Send Time Window
Within the Company-Wide Send Time Window section of the Preference Settings page, time restrictions are set to promote a positive candidate response rate for messages. If a candidate receives messages too early or too late in the day, they may not send a reply. When the Enable Send Time Restriction toggle is on, messages are only sent during the configured time frame.
Managers and customer admins can enable the time restriction by toggling the Enable Send Time Restriction setting on, completing the Start Hour, End Hour, and Timezone fields, and then clicking Save.
Notes:
- The Start Hour, End Hour, and Timezone fields only display if the Enable Send Time Restriction toggle is on.
- If a user tries to schedule a message (including campaign and drip messages) outside of the time frame configured, the message is not sent to the candidate(s), and the following message displays in their conversation history: There was an error sending this message: Outside of Send Timeframe.
Connected Applications
Within the Connected Applications section of the Preference Settings page, managers and customer admins can configure integrations with other systems (e.g., iCIMS Applicant Tracking) to conveniently search for and import candidates. Managers and customer admins interested in connecting an account may contact iCIMS Technical Support.

