Overview
Campaigns within iCIMS Text Engagement boost users’ efficiency by allowing them to easily text multiple candidates at once, such as when announcing a new job opening or upcoming career or recruitment event. With campaigns, users can target specific candidates with a series of scheduled messages.
When setting up a campaign, a user first creates the campaign itself. Then, they compile their candidate list and schedule the campaign messages. The steps for each of these activities are provided in the sections below.
Note: This article only outlines creating standard campaigns; for information on Talent Pool Re-Engagement campaigns where users can easily reconnect with multiple existing candidates through automated texts based on their last contact interval and desired tags, review the iCIMS Text Engagement: Creating and Managing Talent Pool Re-Engagement Campaigns article.
Creating a New Campaign
The steps below outline how to add a new campaign to the system.
- From the dashboard, select New Campaign on the top right to launch the Add Campaign popup.
- Note: A campaign can also be created via the Add Campaign button on the Campaigns tab.
- Complete the Campaign Name field (required). Then, enter any additional details as needed, such as:
- Job Code: The ID or code of a job associated with the campaign; serves as the campaign code within Text Engagement.
- URL: A link to include in campaign messages; the system tracks click-throughs for URLs entered in this field.
- Automatic Response: An automated message sent to candidates when they reply to a campaign text.
- Note: If a candidate responds to a campaign message, the message entered in this field will be used instead of any automatic text response a user has configured for their account via the Profile Settings page.
- Enable ARI: Organizations with an iCIMS Digital Assistant subscription can enable the digital assistant for campaigns to further automate responses to candidate messages.
- Note: If your organization is interested in learning more about iCIMS Digital Assistant, contact your account manager.
- Review the campaign details, then select Save to create the new campaign.
After the campaign is created, its campaign overview page displays. From this page, the user can add candidates to the campaign and schedule campaign messages.
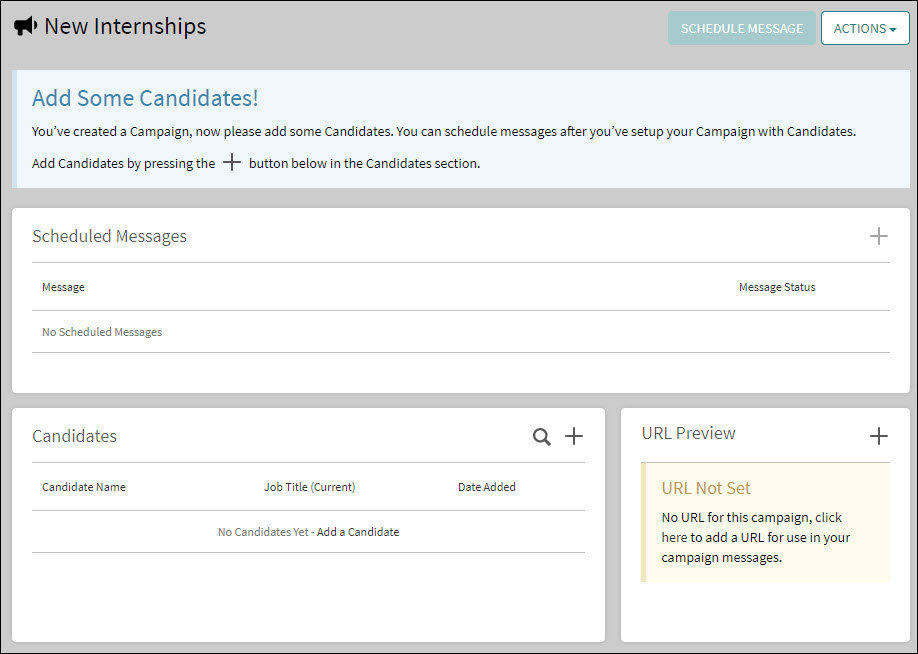 An example campaign overview page
Adding Candidates to a Campaign
The steps below discuss how to add candidates to a campaign. Candidates added to a campaign are stored together as a campaign list, which allows a user to text multiple candidates at once.
- On the campaign overview page, select the Add a Candidate to this Campaign (plus) icon in the Candidates section to launch the Add Candidates popup.
- On the popup, select the Select button to the right of the desired method of adding candidates to the campaign. Methods include the following options:
- Select Candidates: Select candidates to add to the campaign from those who already exist within the system.
- Single Candidate: Create a new candidate and add them to the campaign by entering their name and phone number.
- File upload: Upload a file containing candidate information to bulk add both new and existing candidates to the campaign.
- Complete the prompts for the selected method to add candidates to the campaign.
The added candidates then display within the Candidates section of the campaign overview page.
Tips:
- Smaller campaigns send more quickly; for this reason, iCIMS recommends keeping the number of recipients under 25,000 (which would take about an hour to send within the United States).
- To remove a candidate from the campaign, hover over the candidate's row, then select the Remove Candidate icon available in the last column.
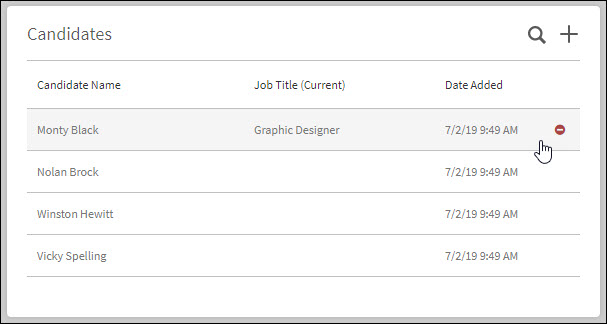 An example Candidates section of a campaign overview page
Scheduling a Campaign Message
Campaign messages leverage the same Schedule Message popup as standard scheduled messages. To schedule a message associated with a campaign, complete the steps below:
- From the campaign overview page, select Schedule Message on the top right to launch the Schedule Message popup.
- Follow the instructions listed in the Scheduling a Message section the iCIMS Text Engagement: Understanding Scheduled Messages article.
Note: If a URL is associated with the campaign, that link is included in the URL field by default. To insert this URL into the message, select the URL button in the Mail Merge toolbar.
The campaign message then displays within the Scheduled Message section of the campaign overview page. Additional messages can be scheduled, as needed, following the same process.
Note: Campaign messages scheduled to be sent at a later time can be edited or canceled any time prior to their scheduled date and time. To learn how to edit or cancel a scheduled message, review the
iCIMS Text Engagement: Understanding Scheduled Messages article.

