Overview
With scheduled messages, users can boost their efficiency by composing messages in advance and choosing when to deliver them to candidates. Scheduled messages can also leverage drip messages, or automated follow-up messages sent to unresponsive candidates.
This article provides information on the following topics:
Note: Scheduled messages should be used when reaching out to individual candidates. To contact multiple candidates at once, using a campaign is recommended. For more information on campaigns, review the
iCIMS Text Engagement: Creating a Campaign article.
Understanding Scheduled Messages
Scheduled messages are created through the Schedule Message popup. This popup can be launched from the following areas of the system:
- Dashboard
- My Inbox tab
- Team Inbox tab
- Candidate profile
Note: A Schedule Message button is also available on campaign overview pages. Scheduled messages sent through a campaign are tracked on that campaign’s overview page and contribute to campaign metrics. For more information on campaigns, review the
iCIMS Text Engagement: Creating a Campaign article.
The Schedule Message popup presents the user with several options to compose and schedule their message; these options are outlined below.
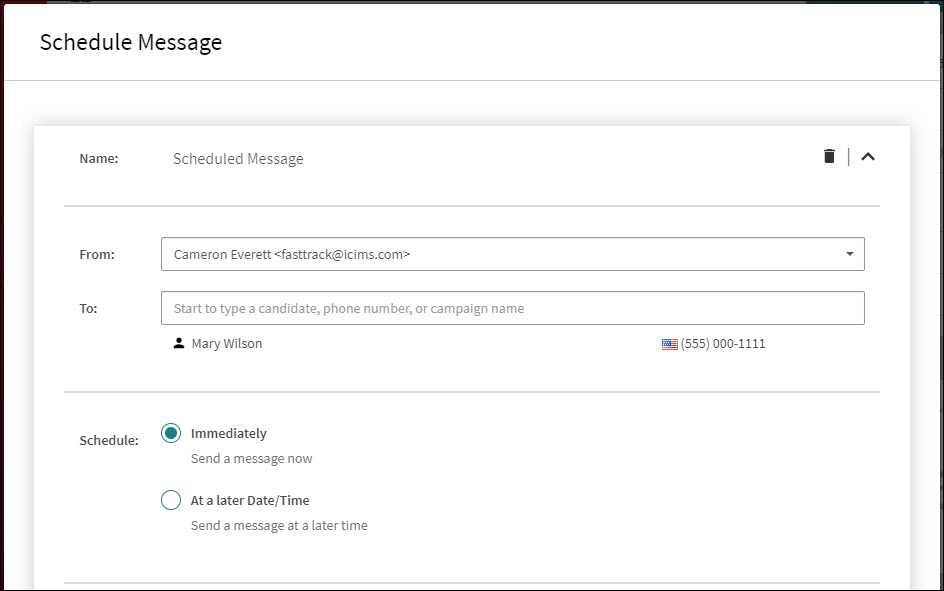 The top half of the Schedule message popup
 - Name: A label that indicates the type of message being created (e.g., Scheduled Message or Drip Message 1). This cannot be updated.
- Cancel (trash can) icon: An icon that discards the message and closes the popup.
- Expand/Collapse (arrow) icon: When multiple messages exist on the popup (e.g., a scheduled message and a drip message), this icon expands or collapses the details of a specific message.
- From: The sender of the scheduled message. By default, From is set to the user scheduling the message.
- Notes:
- If a different sender is selected, responses to the scheduled message are directed to that user’s inbox.
- Only managers have access to this option.
- To: The recipient(s) of the scheduled message. Recipients can include both individual candidates and campaign lists.
- Notes:
- When the Schedule Message popup is launched from a candidate profile, the candidate is automatically listed as a recipient.
- If a campaign list is selected as the recipient, the scheduled message becomes associated with that campaign.
- A new candidate can be created while scheduling a message by entering their phone number in the To field, clicking Add New Candidate, and following the prompts.
- Schedule: The date and time the message will be sent. Available options include:
- Immediately: Sends the message immediately upon clicking Send.
- At a Later Date/Time: Allows the user to select a future date and time to send the message.
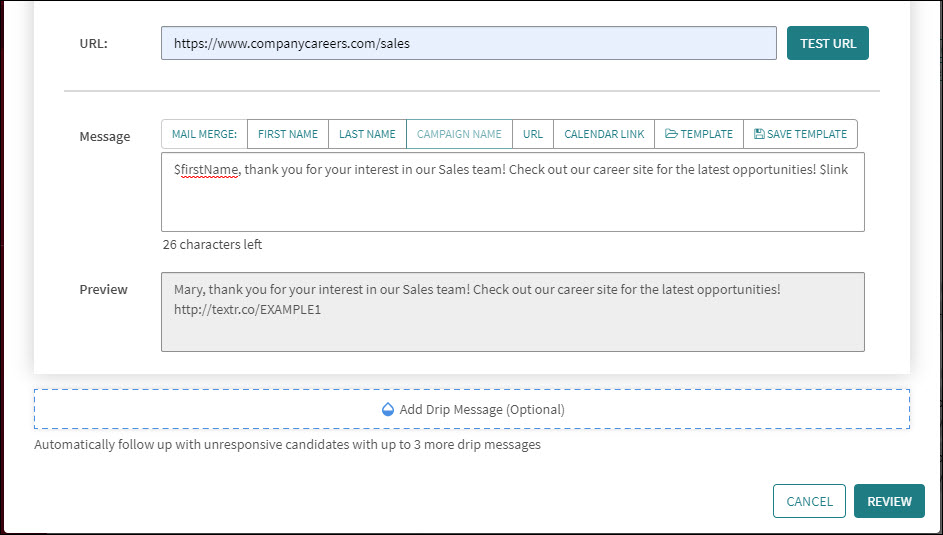 The bottom half of the Schedule Message popup
- URL: An optional link that can be included in the message.
- Notes:
- To insert this link into a message, use the URL mail merge option when composing the message.
- When added to a message, the URL is shortened to reduce the number of message characters used.
- The system tracks the number of click-throughs for URLs entered in this field; click-throughs are counted as candidate responses.
- Message: The content of the scheduled message (limited to 1600 characters). In addition to the text box, the following options are available in the Mail Merge toolbar:
- Mail merge variables: Allows the user to add variables, such as First Name or URL, to the message. These variables dynamically populate with the appropriate information when the message is sent.
- Calendar link: Adds a link to the user’s calendar to the message; candidates can access this link to select an available timeslot and schedule an appointment.
- Template buttons: Template allows the user to select a premade message from a list of templates; Save Template saves the current message as a template for future use.
- Preview: An example of how the message will appear when sent.
- Note: The preview message, which displays resolved mail merge variables, is used to determine the number of characters remaining for the user’s message (e.g., 22 characters left out of 1600).
- Add Drip Message (Optional) button: A button that allows the user to add up to 3 drip messages (i.e. automated follow-up messages) to the scheduled message.
- Cancel button: A button that discards the message and closes the popup.
- Review button: A button that brings the user to a review page where they can send/schedule the message.
Understanding Drip Messages
A drip message is an automated follow-up message sent to candidates who have not responded to a scheduled message within a specified time frame. Up to 3 drip messages can be added to a single scheduled message.
If a candidate takes one of the actions below after receiving a scheduled message, they are considered responsive and will not receive any drip messages.
- Texts a reply to the recruiter
- Calls the recruiter’s Text Engagement phone number
- Clicks a qualifying link included in the scheduled message
- Note: Only click-throughs for links entered in the URL field of the scheduled message qualify as responses; click-throughs for links entered directly into a message are not tracked.
Clicking the Add Drip Message (Optional) button available at the bottom of the Schedule Message popup adds a blank drip message to the form.
Drip messages have many of the same options as standard scheduled messages; the options unique to drip messages are outlined below.
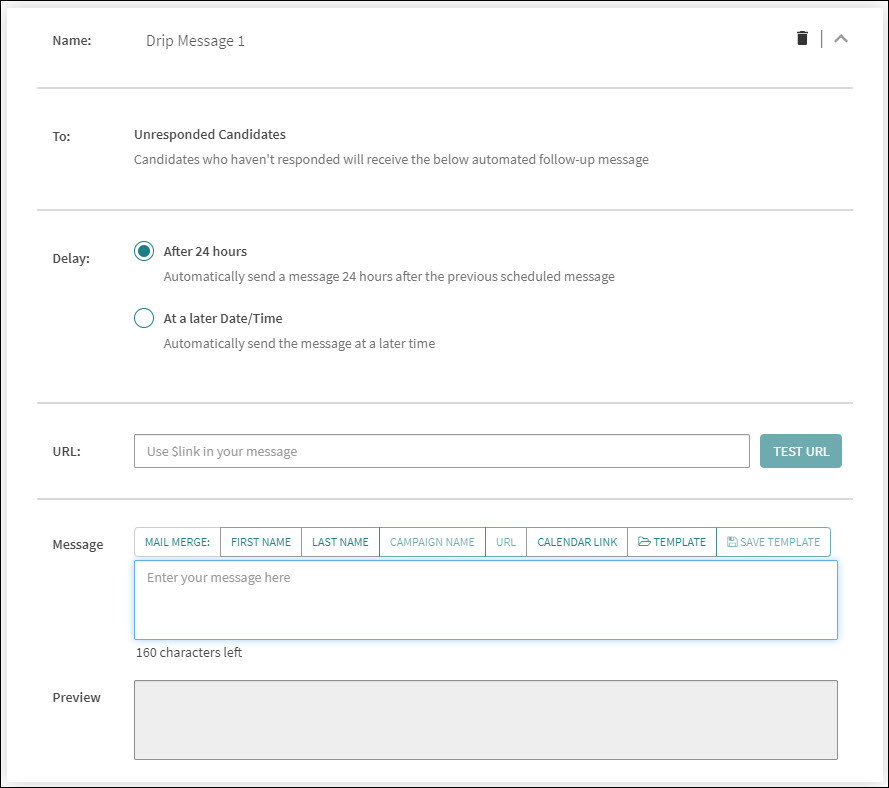
- Remove Message (trash can) icon: An icon that deletes the drip message.
- Note: This icon does not cancel the scheduled message or close the popup.
- To: The recipient of the drip message. To is automatically set to Unresponded Candidates and cannot be changed.
- Delay: The timeframe in which the drip message is sent to unresponsive candidates. Available options include:
- After 24 hours: Sends the drip message 24 hours after the last message (e.g., the original scheduled message or a previous drip message) was sent
- At a Later Date/Time: Sends the drip message at a specified date and time
- Note: The specified date and time must be at least 24 hours after the last message was sent
Scheduling a Message
Scheduled messages can be composed from multiple locations within the system, as listed in the
Understanding Scheduled Messages section of this article. The steps below use the dashboard as the starting point.
- From the dashboard, click Schedule Message on the top right to launch the Schedule Message popup.
- Enter one or more recipients in the To field. If necessary, update the From field.
- In the Schedule section, choose when to send the message. If the At a Later Date/Time option is chosen, select the desired date and time.
- In the URL section, enter an optional link to include in the message.
- In the Message section, compose the message to send to the candidate. Alternatively, click the Template option from the Mail Merge toolbar and select a template from the list.
- If desired, click Add Drip Message (Optional) to create and schedule up to 3 automated follow-up messages.
- Once the scheduled message and any drip messages are composed, click Review to view an overview of the messages. Then, click Send to send the message.
- Note: If At a Later Date/Time was selected during step 3, the Send button is labeled as Save.
Editing a Scheduled Message
A message that is scheduled to be sent at a later time can be updated prior to its scheduled date and time. To edit a scheduled message, follow the steps below.
- On the dashboard, click the Scheduled Messages widget to display a list of your upcoming messages.
- From the list of scheduled messages, click the message you wish to edit to launch the Edit Messages popup.
- On the popup, click the scheduled message or a drip message to expand its details. Update any of the fields (e.g., recipients or schedule date/time), as needed.
- Once the necessary edits are complete, click Save to update the scheduled message.
Canceling a Scheduled Message
A message that is scheduled to be sent at a later time can be canceled prior to its scheduled date and time. To cancel a scheduled message, follow the steps below.
- On the dashboard, click the Scheduled Messages widget to display a list of your upcoming messages.
- From the list of messages, locate the message to cancel. Hover over the scheduled time listed in the Message Status column; a Stop Message button then appears.
- Note: Alternatively, click the message in the list to open the Edit Messages popup to review message details before canceling.
- Click Stop Message. Then, select Yes on the confirmation popup to cancel the message. The message’s status is then updated to Cancelled.
Notes:
- Scheduled messages can also be canceled from individual candidate profiles and campaign overview pages. To cancel a message from these locations, navigate to the appropriate candidate profile or campaign overview page, then complete steps 2-3 above.
- If a scheduled message has multiple recipients, canceling the message from any location stops it from being sent to all recipients. To prevent a scheduled message from going to a specific candidate, they should be removed as a recipient. Review the Editing a Scheduled Message section of this article for more information.

