Overview of iCIMS Connect (Legacy CRM)
Connect provides customers with the ability to attract and engage candidates in their talent pipeline. With various functionality, Connect allows you to continually build that pipeline and keep these individuals engaged until the right job or opportunity becomes available.
For more on Connect, review Getting to Know iCIMS Connect (Legacy CRM). And for more information on how to acquire it, reach out to your iCIMS account manager.
|
iCIMS continues to support new and existing Connect customers while innovating a more robust CRM solution, iCIMS Candidate Relationship Management (CRM).
CRM includes:
- A drag-and-drop email editor to quickly design templates for your emails and campaigns.
- A comprehensive event management feature for virtual and on-site events.
- Functionality to match candidates in your CRM to any open job.
For more on Nurture, review Getting Started with iCIMS Candidate Relationship Management (CRM). |
The Importance of Email Campaigns in Recruiting
Email campaign functionality in Connect allows you to automate emails to your candidates without having to send them manually. You can share career opportunities, networking events, and company information in scheduled messages on a reoccurring basis, and even view reports that track opens, clicks, and applications resulting from those campaigns.
Email campaigns are created and managed from the Email Campaigns page in the system (Communicate > Create/Manage Email Campaigns).
To learn more about the tabs available on this page, please review Email Campaign Tabs below.
Creating and Managing Recipient Lists
Before sending your email campaign, it is important that you have the proper recipient list set up for that campaign. A recipient list is a related group of individuals who would receive your email(s); you can tailor your content to those individuals to ensure they're only getting relevant information. Each recipient list is categorized by list type—Person, Recruiting Workflow, or Sourcing Workflow—and built in the same way you would run a search in the system. For more information on conducting searches, please refer to the Introduction to Searching & Reporting article.
The following steps detail how to create a new recipient list from the Email Campaigns page:
- Select Communicate from the menu bar, then Create/Manage Email Campaigns.
- Select the Recipient Lists tab, then the Create Recipient List button.
- Select the type of search you would like to build the list from: Person, Recruiting Workflow, or Sourcing Workflow.
- Enter any desired keywords and criteria on the Search Form. Then, select the Search button.
- Tips:
- The recipient list search will filter out any candidates with bounced or invalid emails, leaving only those whose email status is confirmed, untested, or autoreplied.
- A Preview Only watermark will display over the search results preview, indicating that the list is subject to change if the recipients chosen no longer meet the defined search criteria or if additional recipients meet the defined search criteria. Unlike normal search results, users will be unable to select any links within the search results preview.
- Select the Save Recipient List… button, located on the bottom right of the screen, to save the recipient list.
- In the Save Recipient List popup, enter the desired title and description.
- Tip: To overwrite an existing list, select the Overwrite Existing List option. Then, in the Template dropdown, select the desired recipient list.
- Select the Save button to finalize all changes. Or select the Save & Create Campaign... button to save the recipient list and create a new email campaign (following the instructions starting with step 3 of Creating an Email Campaign below).
Creating an Email Campaign
Email campaigns allow you to share information regularly with your candidates. For instance, you can inform them about new jobs in their area of interest or share news coming out of a certain department. The following example describes how to create an email campaign from the Campaigns tab. (To create an email campaign after creating a recipient list and selecting Save & Create Campaign…, skip to step 3 in the instructions below.)
- Select Communicate from the menu bar, then Create/Manage Email Campaigns.
- Select the Campaigns tab, then the Create Campaign button.
- Enter the campaign name in the Campaign Name field.
- Tip: If you plan to create a new recipient list from this page, proceed to step 6 now and create your list from the Recipient List dropdown. When finished, return here to step 3. If you create your list after entering information on this page, that information will be lost.
- Select one of the available categories in the Category dropdown.
- Select the From address for the campaign using the From dropdown. (Note: You can only send campaigns from the email address associated with your login or the no-reply address set up for your system, e.g., autoreply@icims.com, if applicable. Email campaigns do not currently support the Send From feature available through Compose Email.)
- Select a recipient list from the Recipient List dropdown.
- Note: You can create a new recipient list on the fly by selecting Create New List from this Recipient List dropdown and following the steps outlined in the Creating and Managing Recipient Lists section above.
- Select the Configure Email… button.
- If desired, select the Template dropdown to open a template from the Connect Email Campaign Templates category in the Email Template Library. (Only templates shared with the specific user will be accessible.)
- Note: You can save your current email as a new email template by selecting the Save (disk) icon to the right of the Template dropdown. Any new template you create here would be added to the Connect Email Campaign Templates category in the Email Template Library. For more information, please refer to the Creating and Managing Email Templates article.
- Preview the email campaign before it is sent by selecting the Preview button. Edit the email campaign message as necessary, and select the Schedule button to continue.
- Tips:
- Message variables are highlighted in green and will populate with the appropriate data when the email is sent. The system will display an alert if a message variable does not resolve for valid emails.
- Using a no-reply email address as the From address will make all sender variables unavailable. This will be indicated on the Edit Campaign form as a warning message and beside templates containing unavailable variables.
- Most scheduled emails (such as event-related emails) should be individually edited before going out in order to remain current and relevant to recipients.
- Select a Start Date by selecting the Calendar icon.
- Select the approximate Start Time for the campaign.
- Tip: The approximate start time frames available are: Immediately, Early Morning (12AM to 7:59AM), Morning (8AM to 11:59AM), Midday (12PM to 4:59PM), Evening (5PM to 8:59PM), and Late Night (9PM to 11:59PM). Time intervals will always be in the time zone of the logged-in user.
- Select the reocurrence for the campaign from the Occur dropdown. The reocurrence selections are: once, daily, weekly, every two weeks, monthly, quarterly, every weekend, and custom. If applicable, an Expire option will display. Select an expiration for a reoccurring campaign by selecting and/or editing the appropriate Expire radio button option.
- Select the Finish button to finalize all changes.
Email Campaign Tabs
There are four tabs at the top of the Email Campaigns page: Campaigns, Upcoming Schedule, Recipient Lists, and Reports. The following sections provide an introduction to each of these tabs.
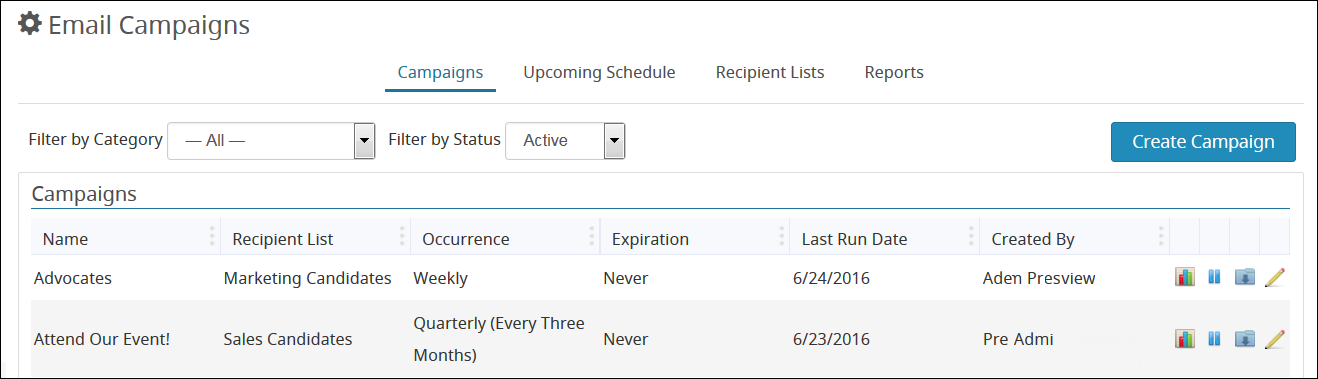
Campaigns Tab
Through the Campaigns tab, you can create a new campaign (as outlined in Creating an Email Campaign above), as well as view all of your email campaigns. You can filter campaigns by their category (All, Career Opportunities, Events, Newsletters, and Other) and status (All, Active, Paused, and Archived). By default, only Active email campaigns will display.
You can also view each campaign’s Name, Recipient List, Occurrence, Expiration (will not display a value for Paused and Archived campaigns), Last Run Date, and Created By information.
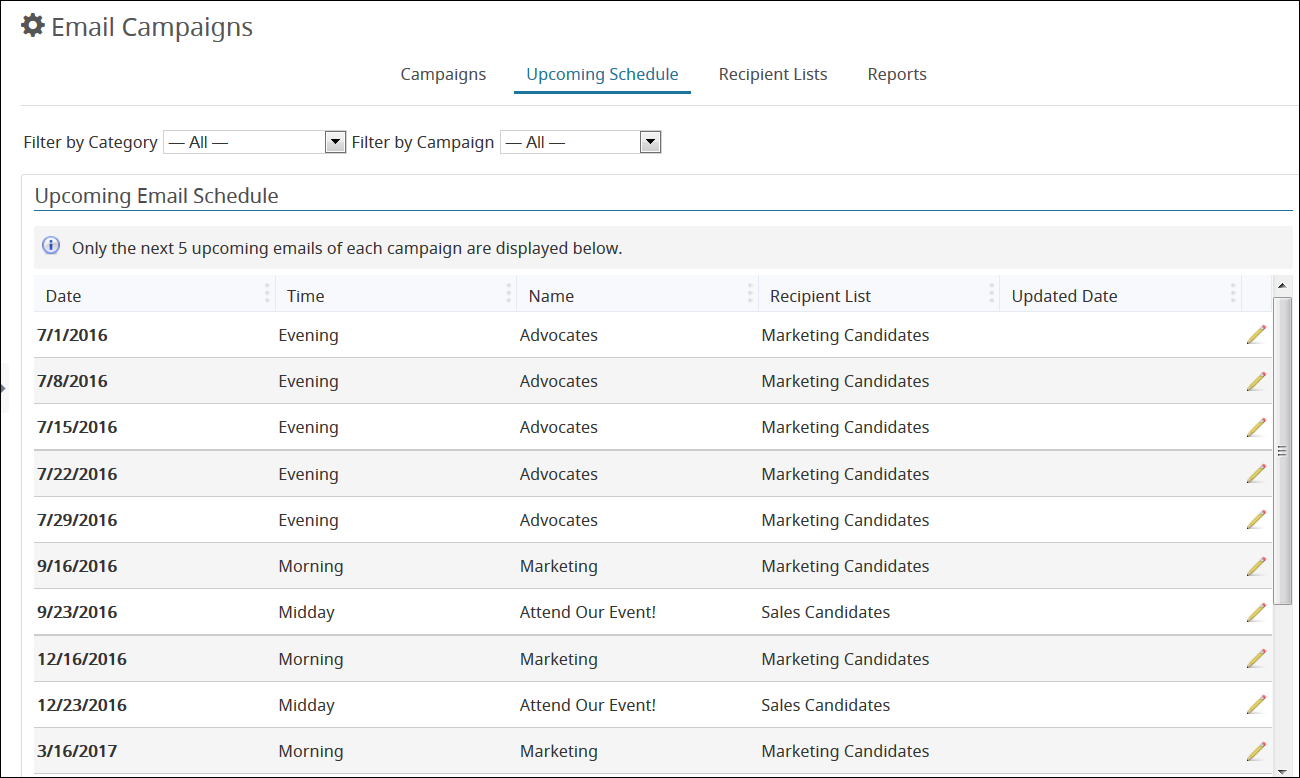
Upcoming Schedule Tab
The Upcoming Schedule tab allows you to view the upcoming schedule for your campaigns, as well as edit emails that are scheduled to go out at a future date. Active email campaigns will have up to 5 upcoming scheduled emails available to edit; if there are fewer than 5 emails remaining in a campaign, then all the remaining scheduled emails will be available.
Recipient Lists Tab
The Recipient List tab allows you to create and run search criteria to build recipient lists for campaigns, as outlined in Creating and Managing Recipient Lists above.
Reports Tab
The Reports tab provides you with valuable metrics that allow you to view the success of an email campaign and compare it to other campaigns. By default, the Reports tab will display statistics for all categories/campaigns together; however, you will have the ability to filter by category (displaying totals within a given category) and campaign (displaying totals for that selected campaign). Archived campaigns will be available within the Campaign dropdown.
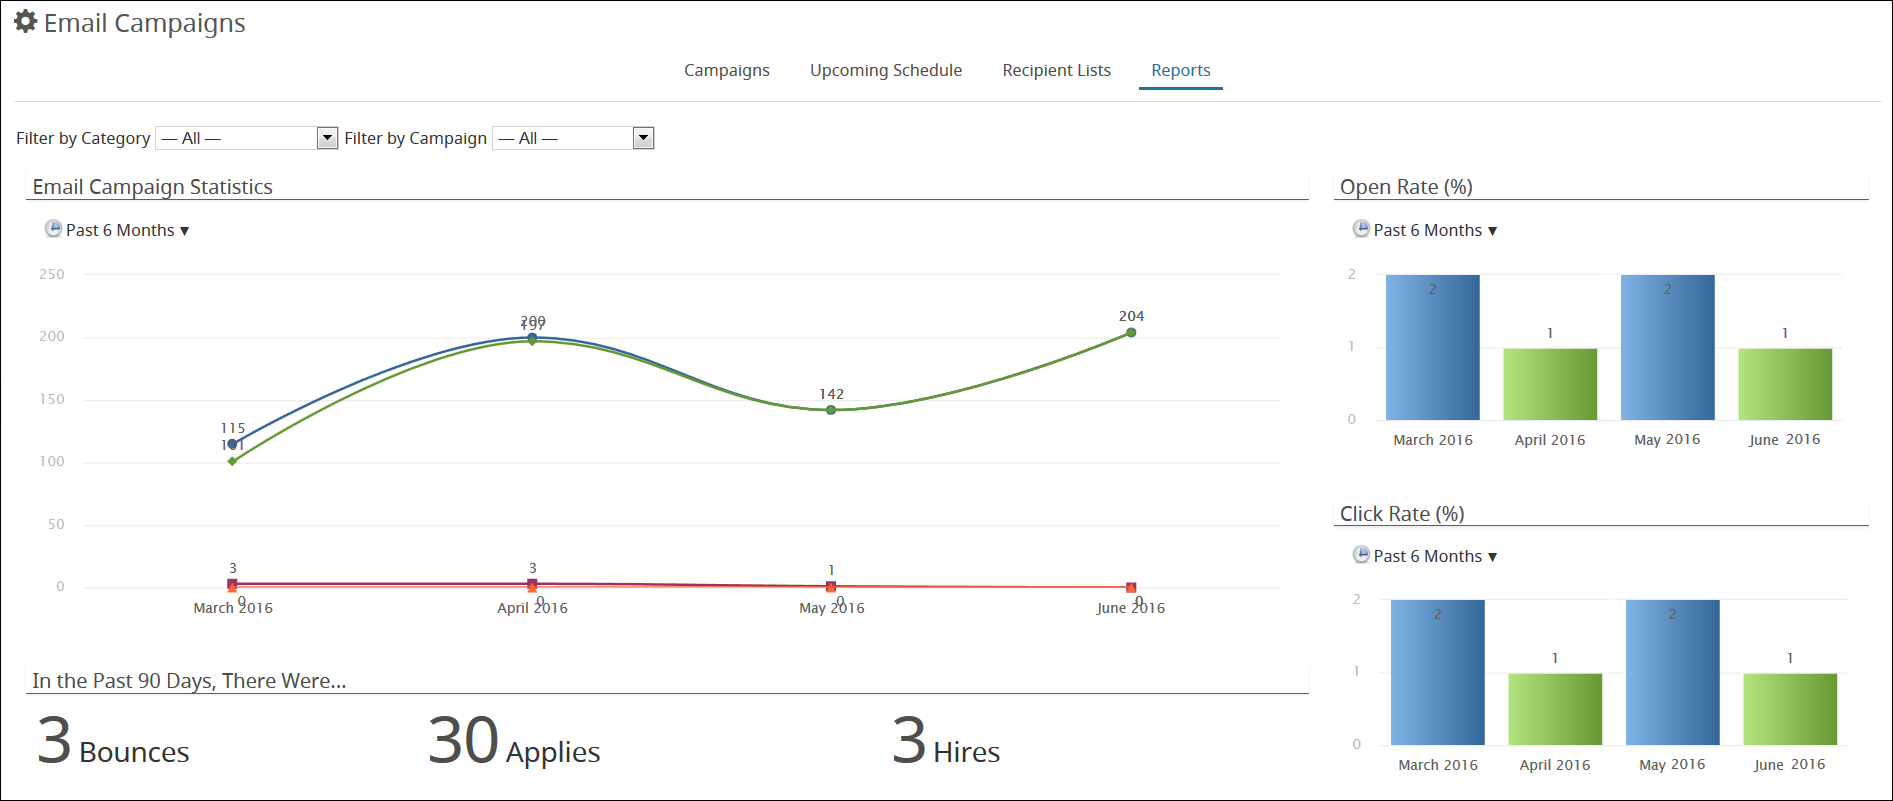
Tips:
- You can view the results of a specific email campaign by selecting data points inside each chart or by selecting the graph icon next to the campaign name on the Campaigns tab.
- Changing the time frame for email campaign charts will reflect on the search form if you select the full search results. Changing the Campaign Name and Category filters will not reflect on the search form, even though the results of the search will take these filters into account.
- You can also access these reports on the Metrics Dashboard for Connect Email Campaigns. However, you cannot filter reports by category and campaign from the Metrics Dashboard.
For more information on accessing Metrics Dashboards, including the Email Campaigns Metrics Dashboard, please refer to the Introduction to the Dashboard article.
User Group Permissions for Email Campaigns
Users admins can determine which user groups have access to particular aspects of Connect's email campaign functionality. They can do this through different settings in System Configuration, available via
Admin > System Configuration > Connect > Email Campaigns. By default, these settings are enabled for both user admins and recruiters.
- Email Campaigns: Allows user group access to the Create/Manage Email Campaigns page.
- Note: Users who cannot create/manage email campaigns are also unable to access Search > Email Campaign.
- Manage Campaigns: Allows user groups to create, edit, and archive email campaigns.
- Archive Campaigns: Allows user groups to archive email campaigns for historical reporting purposes.
- Manage Recipient Lists: Allows user groups to create, edit, and delete recipient lists.
- Manage Others' Campaigns and Lists: Allows user groups to create, edit, and archive/delete others' campaigns and recipient lists.
Recommended Next Steps
If your organization runs events, use Connect's email campaign functionality to promote your events and invite candidates to register for them. This can potentially increase event attendance, as well as increase overall awareness of your brand. Each Event profile includes a sign-up link and QR code that you can include in your emails for easy registration. For more information, review Creating and Managing Events in iCIMS Connect (Legacy CRM) .
If you also use talent pools, make sure to set up separate recipients lists for those talent pools on the Email Campaigns page so you can properly engage and nurture those candidates over time.
iCIMS Connect Curriculum
The iCIMS Knowledge Base includes additional resources to prepare users to use Connect. These resources have been compiled in the following article: Getting to Know iCIMS Connect (Legacy CRM) .

