Overview
A
Person search allows users to search for Candidate, Employee, and/or Hiring Manager profiles in iCIMS Applicant Tracking (ATS), Offer Management, Onboarding, and iCIMS Connect (Legacy CRM). Users are able to search for specific or grouped Person profile records. Searches can also be saved and added to the Dashboard to run automatically and provide users with the most up-to-date search results.
Types of searching and reporting that you would use the Person search feature for include:
- Finding candidates with specific keywords in their profile
- Finding candidates living in a particular area
- Finding all candidates not attached to a job
- Generating candidate source reports
- Generating candidate EEO reports
- Finding new candidates entered since last work day
- Finding all candidates who are employees
- Finding all candidates who are ex-employees along with their eligibility for rehire
To learn how to run any of the searches and reports listed above specifically, refer to the
Common Reports article.
Creating a Person Search
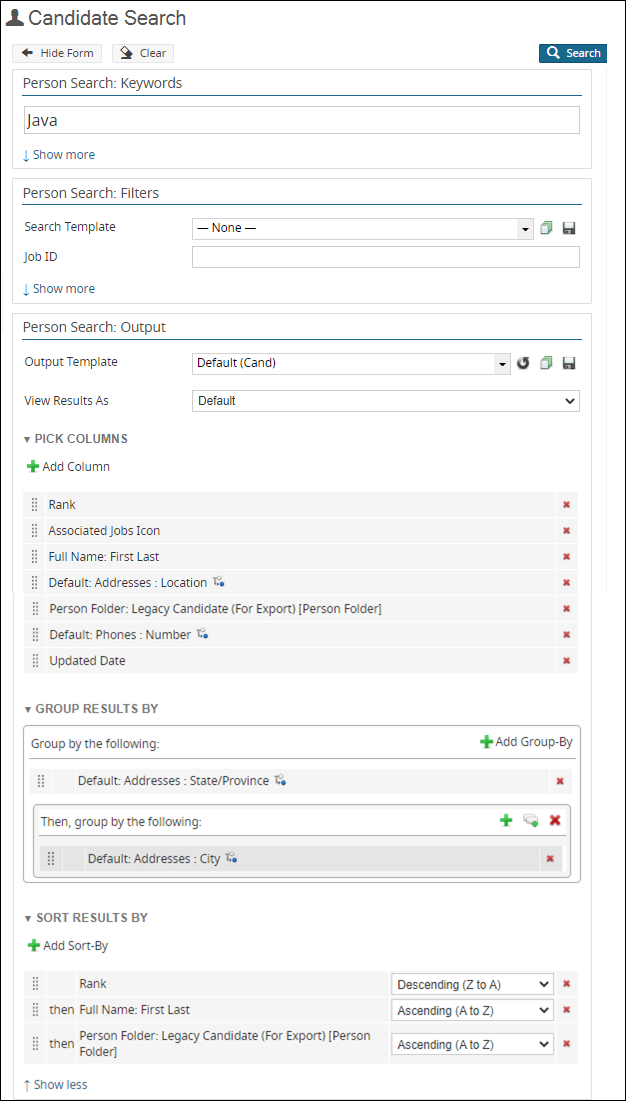
Example: The following section will demonstrate how to use the Person search feature by guiding you through the following example:
- Search for all candidates with the keyword java in their profile.
- Group the search output by state and then by city.
Tip: Based on this example, the steps below begin with the selection of
Person Search > Candidate from the Search menu. To initiate a generic Person search, begin with
Person Search > Person and enter criteria as relevant.
- To access the Candidate search, select Search from the menu bar, then Person, and then Candidate.
- Enter java in the keyword field to search for Candidate profiles that contain the term.
- If necessary, click Show more within the Person Search: Output section. Once this section is expanded, click the expand triangle to the left of Group Results By to expand the subsection. (This will allow the application of the state and city grouping as stated in the scenario.)
- Click the Add Group-By button to add the first group.
- Enter state in the popup search box. Select State/Province under Group-Bys > Contact Tab > Default: Addresses > General. Click the Add Selected button to continue.
- Click the Add Level button to add the next level of grouping.
- Notice that the new white area displays beneath the first group-by. Click the green Add Group-By (plus sign) icon within this area to add the second level of grouping.
- Enter city in the popup search box. Select City under Group-Bys > Contact Tab > Default Addresses > General. Click the Add Selected button to continue.
- Click the Search button to run this search.
- Click the expand triangle beside a desired group to view the search results in that group.
Additional Resources
If you're looking for a quicker search option, try a Simplified Candidate Search. This search includes no filters, outputs, or groupings. By entering just a job title, keyword, or skill (and location, if desired), you can find qualified candidates for your job or talent pool who already have profiles in your system.
For more information, see Using Simplified Candidate Search.
Searching & Reporting Curriculum
The iCIMS Knowledge Base includes additional resources to introduce users to searching and reporting within the iCIMS system. These resources have been compiled in the following article: Searching & Reporting Curriculum.

