Overview
A number of iCIMS' Talent Cloud products use person, job, and other profiles to track and store information related to the talent acquisition process, including:
- iCIMS Candidate Relationship Management (CRM)
- iCIMS Applicant Tracking
- iCIMS Offer Management
- iCIMS Onboarding
The profiles in each organization's system include standard and custom fields that support the organization's information collection needs. User admins may add custom fields to profiles and may make edits to existing fields as necessary.
This article includes the following sections to support a user admin's understanding of fields:
Understanding Field Terminology
Profile Organization and Terminology
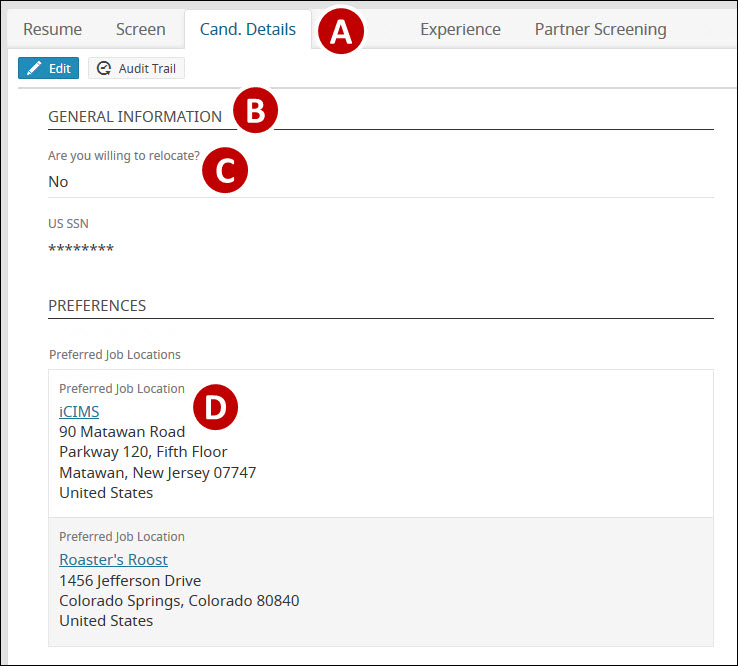
Profiles are organized with information in tabs, which are in turn organized by sections. Each section can have fields (or field groups) within it.
- Tab
- Section
- Field
- Field Group
The information stored within a profile can be configured using System Configuration. Once a tab has been added to a profile and at least one section has been added to that tab, a new field can be added to that section.
- Note: A field cannot be added to a tab without at least one section on that tab. For more information, including steps to add a section to a tab, review the Adding and Editing Profile Tab Sections article.
Standard and Custom Fields
Profiles typically include both
standard fields and
custom fields. Standard fields exist in the system before customers even begin implementation. They are designed with best practices and system functionality in mind to support organizations in collecting specific talent acquisition information. For example, the standard First Name (FirstName) field on the Person profile is designed to hold a person's given name.
Notes:
- While standard fields can be renamed to suit organizational preferences (e.g., the First Name field might be renamed Given Name in a system), repurposing standard fields is not supported or recommended, as this may introduce risk.
- For example, there are three standard fields that compose a job description and are designed to be shared with candidates on a career portal: Overview (jcf3035), Responsibilities (jcf3036), and Qualifications (jcf3037). In the event that one or more of these fields are not used as part of an organization's hiring process, the fields should not be used for any purpose other than sharing job description information with candidates.
- This same note applies to list options within a dropdown field: A Yes value within a dropdown list can be renamed to Si but must not be updated to No, as this may introduce risk.
Custom fields are created during or after implementation by iCIMS staff (e.g., an Implementation Manager, Technical Support Engineer, etc.) or by a user admin following the steps in the
Adding a Custom Field to a Profile Tab Section section of this article. Custom fields can store talent acquisition information that would not otherwise be stored within a standard field. There is a system limit of 400 custom fields.
Note: Once a custom field has begun collecting information, it is recommended that user admins exercise caution before repurposing or adding/removing field options, as this may lead to reporting or other data integrity errors.
Adding a Custom Field to a Profile Tab Section
Example: In the steps below, a new custom field will be added to an existing section on an existing profile tab. For information about adding tabs, see
Adding and Editing Profile Tabs; for information about adding sections, see
Adding and Editing Profile Tab Sections.)
- Select Admin from the menu bar, and then select System Configuration.
- Select an appropriate option from the left menu (e.g., System or Applicant Tracking) and then select a profile from the list of options to the right (e.g., Person or Job).
- Note: The following paths lead to the most commonly-edited profile types:
- System > Person
- Applicant Tracking > Job
- Applicant Tracking > Recruiting Workflow
- Select a tab, and then locate the correct section. Click the Add New Field button to launch the Add New Field popup.
- Enter a name for the new custom field in the Label field.
- Select the field Type from the dropdown list.
- Tip: There are a variety of field types available to choose from depending on the type of data to be collected within the field. Field types may have unique configuration options to further specify how the data is collected and displayed. For more information on these field types, review the Understanding Field Types article.
- Complete all required fields and click Add. (Required fields will vary according to the field type selected in the previous step.)
- Select the appropriate checkbox to set the field as Hidden, Required, or Read-Only on the profile, if desired. For more information, review the About Hidden, Required, & Read-Only Options section below.
- Click the Save button near the top right of the screen to finalize the addition of the new field. New fields are unavailable for use until saved.
About Hidden, Required, & Read-Only Options
The options for
Hidden,
Required, and
Read-
Only fields can be configured on a per-user group basis by choosing a group from the
User Group dropdown list.
- Selecting Hidden will hide the field.
- Selecting Required will require the field to be filled out.
- Selecting Read-Only will lock the field down so that it can be seen, but not edited, by users.
Note: Hiding a standard field or a custom field that has been used to collect data is generally not recommended, as hiding fields can introduce risk for any fields that contain data or have been used for any system, integration, or organizational purpose. Among other effects, hiding a field can introduce the following system behaviors:
- The field will immediately be removed from any searches referencing it as a Filter or Column, which may cause searches to produce unintended results.
- The field will be removed from any Search Locks or Security Rules that may reference the field, which may lead to unintended visibility of data.
- The field will be removed from any Entrance Criteria that may be in place as part of the recruiting workflow.
- Email templates that reference the field will instead display Invalid Variable.
Editing Existing Fields
A user admin can make a number of different kinds of edits to existing fields in various iCIMS' Talent Cloud products. These include, but are not limited to, renaming the field, changing the placement of the field on the profile, changing field properties (e.g., whether the field is hidden, required, or read-only), changing list items in a dropdown field, etc.
Before editing an existing field, review the potential impacts of the change. For example, renaming a field to better match an organization's terminology (e.g., renaming the
First Name field to
Given Name) typically does not introduce risk. Moving a field to a different section of the profile will affect where the field displays in the system or as part of the application process and could affect user access (e.g., if a user group does not have access to the field's new tab). Changing list items in a dropdown field may have an impact on functionality or reporting; in most cases, it is imperative to not alter a list item's meaning by repurposing it (e.g., do not change a
Yes list item to
No). It is not recommended or supported that standard fields or list items be repurposed; for additional information, review the
Standard and Custom Fields section of this article.
- Select Admin from the menu bar, and then select System Configuration.
- Select an appropriate option from the left menu (e.g., System or Applicant Tracking) and then select a profile from the list of options to the right (e.g., Person or Job).
- Select a tab, and then locate the field to be edited.
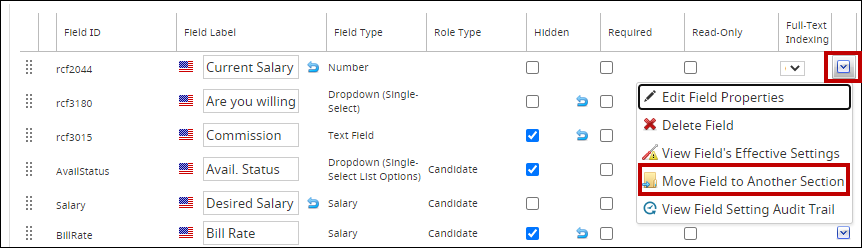
- Review the available options for the field, including the field label and hidden/required/read-only settings. For additional options, click the down arrow next to the field name, and then click the Edit Field Properties button.
- Click the Save button to finalize the changes to the existing field.
Tips:
- The list of options for dropdown fields can be edited after clicking the Edit Field Properties option indicated above. (Some lists, such as degrees, majors, schools, and EEO categories can be also be configured elsewhere in System Configuration. For more information, review the Configuring Profile Lists article.)
- To reorder fields within a section, click the grip icon to the left of the field name and drag the field to a new location. Then, click Save.
- To move a field to a different section (including sections on other tabs), expand the Actions icon (represented by the down arrow to the right of the field name and details), and then select Move Field to Another Section. Then, select the new section from the Section dropdown and click Move. Then, click Save near the top right of the main System Configuration screen.
User Admin Curriculum
The iCIMS Knowledge Base includes additional resources to prepare user admins to work with various iCIMS' Talent Cloud products. These resources have been compiled in the following article:
User Admin Curriculum.

