Overview
As a candidate goes through the recruitment process, from first expressing interest in your organization to being onboarded as a new employee, they are moved through workflow statuses. Workflow statuses help organize and keep track of candidates, facilitate activities associated with each stage of the hiring process, and streamline the overall recruitment process.
For organizations using iCIMS Connect (Legacy CRM), user admins can create and configure statuses for sourcing workflows, which are used to indicate a candidate’s disposition within a talent pool.
This article features the following sections:
|
iCIMS continues to support new and existing Connect customers while innovating a more robust CRM solution, iCIMS Candidate Relationship Management (CRM).
CRM includes:
- A drag-and-drop email editor to quickly design templates for your emails and campaigns.
- A comprehensive event management feature for virtual and on-site events.
- Functionality to match candidates in your CRM to any open job.
For more information, review Getting Started with iCIMS Candidate Relationship Management (CRM). |
Creating a New Sourcing Workflow Status
User admins can create and configure sourcing workflow statuses using the steps outlined below.
- From the main menu, select Admin, then select System Configuration.
- Select Connect from the left navigation pane. Then select Workflow from the list of options to the right.
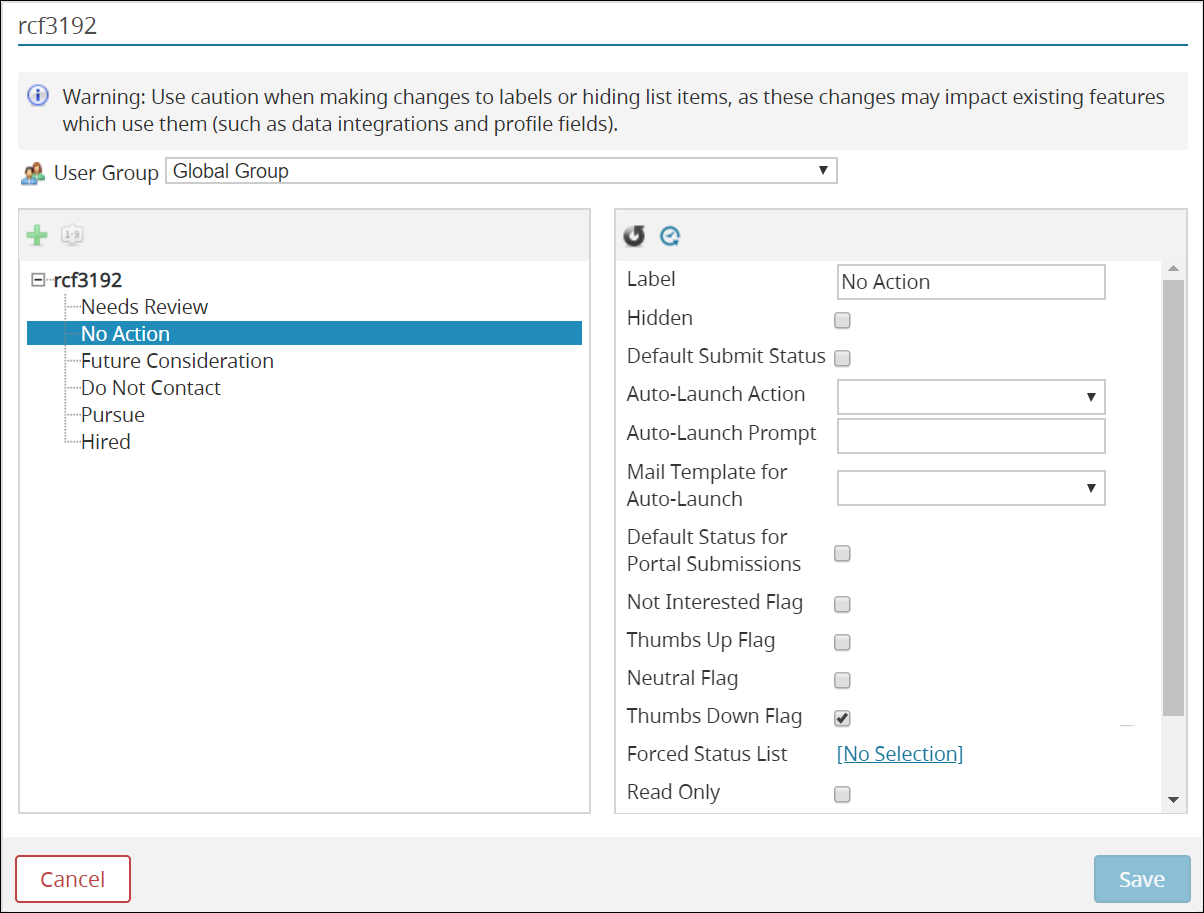
- Next to Modify Workflow Statuses, select Edit List to launch the rcf3192 (sourcing workflow status) popup.
- Select the bold rcf3192 header in the list, then select the Create list item (green plus sign) icon. The new status, temporarily named [New Node], then displays in the list with additional options available on the right.
- Notes:
- rcf3192 is the backend ID for the sourcing workflow status list field.
- The selected User Group must be Global Group to create a new status.
- Fill in the required Label field. Then configure the optional settings (e.g., Auto-Launch Action) as needed. Select Save to create the new status.
Configuring Status Options for Specific User Groups
Individual workflow status options, such as making a status hidden, can be configured per-user group, if needed. The steps for configuring status options for a specific user group are provided below. For more information on the available status options, review the Understanding Sourcing Workflow Status Options section of this article.
Note: Per-user group status options can only be configured for existing statuses. To configure per-user group options for a new status, the status must first be created following the steps in the Creating a New Sourcing Workflow Status section of this article.
- Navigate to the rcf3192 (sourcing workflow status) popup (steps 1-3 in the Creating a New Sourcing Workflow Status section of this article.)
- Select the desired group from the User Group dropdown at the top of the popup.
- Note: By default, Global Group is the selected user group; options configured for this group affect all system users.
- Select the status to configure from the list; the options for that status then display on the right.
- Configure the options for the status, as needed (e.g., check the Hidden box). These options only affect users in the group selected in step 2.
- Review the changes, then select Save to finalize the update.
Understanding Sourcing Workflow Status Options
User admins can configure several options for each sourcing workflow status, such as auto-launch actions or forced status lists. These options can be configured globally for all system users or only for users within specific user groups. The available options are described below.
- Label: The label seen by users within the system.
- Hidden: A hidden status is effectively retired from use; it does not display as an option when changing a candidate’s disposition and cannot be used in searches or reports.
- Notes:
- Statuses that are no longer used by your organization can be hidden to remove them from use; statuses cannot be deleted.
- A hidden status displays as Hidden (List Node ID) rather than as its label when viewed by users it has been hidden from.
- Default Submit Status: Indicates the status that candidates are placed into when submitted to a sourcing workflow through the system (e.g., when a recruiter adds a candidate to a talent pool).
- Note: It is required to have a status configured with the Default Submit Status, and only one status can be set with the Default Submit Status; the standard Needs Review status is set with this by default.
- Auto-Launch Action: The action a user is prompted to complete when they move a candidate into the status. For more information on auto-launch actions, review the Understanding Sourcing Workflow Auto-Launch Actions section below.
- Auto-Launch Prompt: A configurable message that displays before the user can complete a selected auto-launch action. Some example messages include instructions on how to complete the following action (e.g., Send the following email to the candidate) or serve as a process reminder for the user (e.g., Leave a note explaining this status change).
- Note: Auto-Launch Prompt is only applicable when an auto-launch action is selected.
- Mail Template for Auto-Launch: The email template used when a user is prompted to send an email through an auto-launch action.
- Default Status for Portal Submissions: Indicates the status that candidates are placed into when submitted to a sourcing workflow through the portal (i.e., when a candidate selects talent pools that they are interested in).
- Note: It is required to have a status configured with the Default Status for Portal Submissions, and only one status can be set with the Default Status for Portal Submissions; the standard Needs Review status is set with this by default.
- Not Interested Flag: Indicates the status that candidates are placed into when they unsubscribe from a talent pool’s emails or opt-out of all mass email communications.
- Note: It is required to have a status configured with the Not Interested Flag, and only one status can be set with the Not Interested Flag; the standard Do Not Contact status is set with this by default.
- Thumbs Up Flag: Indicates the status that displays with a thumbs up icon under the Review button.
- Notes:
- When a user reviews an event attendee’s fit for a talent pool from an Event profile using the thumbs up icon, the event attendee's status in that talent pool is updated to the status configured with the Thumbs Up Flag. For more information on reviewing event attendees, review the Creating and Managing Events in iCIMS Connect (Legacy CRM) article.
- It is required to have a status configured with the Thumbs Up Flag, and only one status can be set with the Thumbs Up Flag; the standard Pursue status is set with this by default.
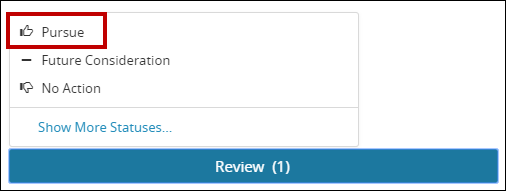
An example of reviewing a candidate from a Talent Pool profile
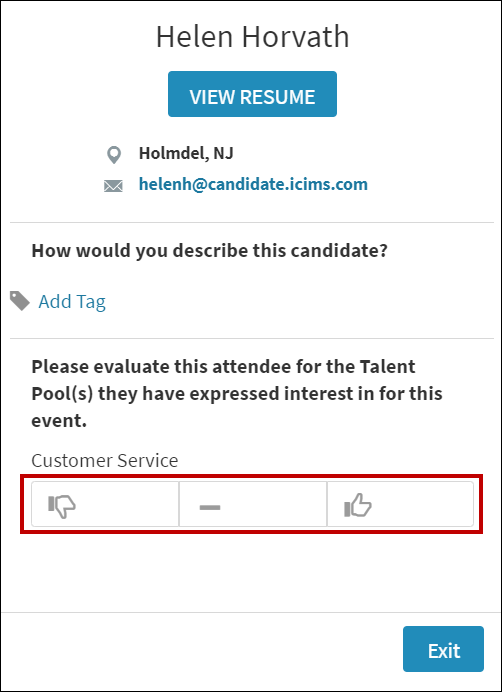 An example of reviewing an event attendee with the thumbs down, neutral, and thumbs up icons from an Event profile
- Neutral Flag: Indicates the status that displays with a neutral icon (-) under the Review button.
- Notes:
- When a user reviews an event attendee’s fit for a talent pool from an Event profile using the neutral icon, the event attendee’s status in that talent pool is updated to the status configured with the Neutral Flag. For more information on reviewing event attendees, review the Creating and Managing Events in iCIMS Connect (Legacy CRM) article.
- It is required to have a status configured with the Neutral Flag, and only one status can be set with the Neutral Flag; the standard Future Consideration status is set with this by default.
- Thumbs Down Flag: Indicates the status that displays with a thumbs down icon under the Review button.
- Notes:
- This flag does not affect a candidate’s talent pool email subscriptions (e.g., this flag does not unsubscribe candidates from talent pool emails.)
- When a user reviews an event attendee’s fit for a talent pool from an Event profile using the thumbs down icon, the event attendee’s status in that talent pool is updated to the status configured with the Thumbs Down Flag. For more information on reviewing event attendees, review the Creating and Managing Events in iCIMS Connect (Legacy CRM) article.
- It is required to have a status configured with the Thumbs Down Flag, and only one status can be set with the Thumbs Down Flag; the standard No Action status is set with this by default.
- Forced Status List: Identifies a list of required sourcing workflow statuses that a candidate must be placed into prior to being placed into the configured status. For more information on forced status lists, review the Sourcing Workflows section of the Setting Up Entrance Criteria for Recruiting Workflows article.
- Read Only: A read-only status is locked, and new candidates cannot be moved into that status; existing candidates in a read-only status are viewable and can be moved out of the status.
Important Note: The standard Hired status (sometimes labeled Submit to Job) is unique in that the system automatically updates all sourcing workflows for a candidate to the Hired status once the candidate has been flagged as hired within a recruiting workflow. The Hired status's label may be changed, but that status, indicated by its list node ID, will always function in this way; this is not controlled by any configurable options. The Hired status should not be hidden or repurposed.
Understanding Sourcing Workflow Auto-Launch Actions
Auto-launch actions boost the efficiency of a workflow by prompting users to complete specific actions when moving candidates into different statuses. Auto-launch actions are configured per status and encompass a wide range of activities, such as sending emails or entering disposition notes. The auto-launch actions available for sourcing workflow statuses are outlined below.
Note: Actions do not need to be completed for the status to change.
- Schedule Appointment: Launches the Schedule Appointment popup to create and send out an appointment invitation to the associated candidate. This action does not consider job details and serves more as a generic appointment. The invitation can only include sender, recipient, and associated contact (e.g., appointment dates) email variables. Job, recruiting workflow, and sourcing workflow variables are not available for use.
- Add Note: Allows a user to enter a note (2 characters minimum) about the associated candidate. If desired, the user can also send an email to the candidate after saving the note.
- Note: The note is saved to the Notes tab of the candidate's Person profile.
- Tip: Using an auto-launch prompt with this action can remind users what type of information they should leave in the note, such as Leave a note explaining this status change.
- Create Task: Prompts the user to assign a Sourcing Workflow library task that was previously configured in the system or create a non-library task with the new hire as the default assignee. For more information on creating tasks, review the Creating Tasks article.
- Tip: If the Create Task auto-launch action does not launch the Add Sourcing Workflow Tasks popup when a candidate is placed into the status configured with it, it is likely that Sourcing Workflow tasks may not be enabled for your system. Contact iCIMS Technical Support if Sourcing Workflow tasks should be enabled for your system.
- Compose Email (Person): Launches the Compose Email popup with the candidate selected as the recipient; the recipient cannot be changed. The user can add a Cc or Bcc to the email, if necessary.
- Note: By default, no template is used with this action. If the status configured with this action has a template selected in the Mail Template for Auto-Launch dropdown, that template then prepopulates in the email popup.
- Compose Email (Forward Workflow): Allows the user to forward information about the selected candidate to a specified recipient through a Compose Email popup.
- Note: By default, this action uses the Send Candidate by E-mail template, which includes the candidate’s resume. If the status configured with this action has a template selected in the Mail Template for Auto-Launch dropdown, that template is used instead.
- Tip: Create a Routed to Recruiter status configured with this auto-launch action to easily facilitate sending a candidate's information to a recruiter at your organization.
- Open iForms Center: Launches the iForms Center popup, which includes a list of iForms that can be sent to the candidate, as well as any previously completed iForms. iForms can be reviewed, edited, or sent through this popup.
- Note: The only available iForms in this popup are Person, Sourcing Workflow, and Talent Pool iForms. For more information on iForms, review the Introduction to iForms article.
- Submit to New Workflow: Allows the user to submit one or more candidates to another workflow by selecting a talent pool, job, or new hire category.
- Note: This action does not remove the candidate from their current workflow.
- Tip: Create a Submit to Requisition status configured with this auto-launch action to easily submit interested candidates to jobs.

