Overview
The Person Import tool provides customers with an easy way to import a list of potential candidates to the system using a CSV-formatted spreadsheet. Each import will create a new Person profile in your system for each individual. (You cannot use person import to update existing profiles.) This tool is not intended as a replacement for any integrations, but rather as a quick and easy way to import multiple candidates into the system at once.
The Person Import tool is available for both iCIMS Applicant Tracking (ATS) and iCIMS Connect (Legacy CRM) customers. It is enabled by default for user admins, and user admins may provide access to the tool to any additional user groups as necessary as described in the Enabling the Person Import Tool for Additional User Groups section of this article.
Warning: Customers with an HRIS integration should discuss using the Person Import tool with their iCIMS point of contact prior to performing an import, as this tool automatically provides an external ID to each new profile, which may disrupt integrations with HRIS providers expecting an empty or blank external ID for each profile.
Using the Person Import Tool
Each import will create a new Person profile in your system for each individual. (You cannot use person import to update existing profiles.)
The following fields are available for import: First Name, Last Name, Home Phone, Email, Home Street, Home Street 2, Home City, Home State, Home Country, Home Zip, Home County, Willing to Relocate, Years of Experience, Source, Source Name, Education, School, Degree, Major, GPA, End Date, Start Date, Professional Experience, Title, and Employer.
Note: Fields on the Person profile that are marked as required must be included in the import. Required fields will display on the Map Fields screen, as shown below in step 4.
Warning: Duplicate profiles will not be imported into the system. If you attempt to import a duplicate, the system will yield a Finished with Error(s) status.
The following steps outline how to perform a successful import:
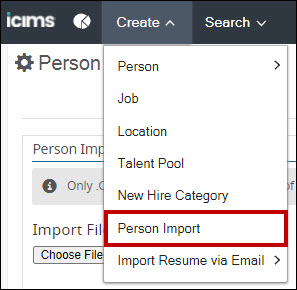
- From the menu bar, select Create, then Person Import from the dropdown menu.
- Click the Choose File button to locate the file on your computer. Select the correct file and click Open.
- Click the Import button to import the file. Your import will be added to the scheduled list and will begin immediately.
- Adjust field mappings on the Map Fields screen, if necessary, and click the Start Import button, located at the top right.

- Warning: Fields that are required and not selected will be indicated with a yellow warning icon; the Start Import button will be unavailable until this is resolved. Required fields may vary based on your individual system and user settings.
- Tip: If your CSV file imports successfully yet has a Pending status in the Import History Log, click the Refresh button at the top right. The status should change to Finished.
- Select the View people brought in through this import icon that is displayed in the Results column to view all successfully imported candidates in a search results view.
- Check the box to the left of each desired candidate, and use the Submit to Workflow button to submit one or more candidates to a talent pool if desired.
Enabling the Person Import Tool for Additional User Groups
User admins can provide access to the Person Import tool to any additional user groups, such as recruiters.
- From the menu bar, select Admin, then System Configuration from the dropdown menu.
- Click System, then General Platform. Scroll down to the Person Import section.
- Select a required user group from the User Group drop-down.
- Select the Enable Person Import checkbox to enable the Person Import option for the selected user group.
- Select the optional Show All Previous Imports checkbox to enable the user group to see all the previously imported files.
- Click Save.
The Person Import tool will be available from the Create menu for users within the selected user groups.
Subscriber Data associated to legacy data migration and systems integration must be provided by Subscriber (or Subscriber authorized third party) to iCIMS in iCIMS’s CSV/XML Import Format (refer to iCIMS Spec Requirement for details). In the event Subscriber requests iCIMS to conduct a Subscriber Data update to Subscriber's Subscription iCIMS Talent Acquisition Suite by use of the CSV Import Tool, Subscriber shall pre-screen such Subscriber Data to ensure its accuracy, integrity, completeness, and quality prior to making the Subscriber Data available to iCIMS. Subscriber acknowledges that iCIMS can only conduct a full system restoration (at its then current fees) based on the most recent data backup prior to the modification or deletion of the Subscriber Data. Any actions taken, including additional job, candidate, or hiring manager profiles created after the data backup, will be lost. Subscriber Data loss or corruption must be reported to iCIMS within seven (7) days; failure to do so may prevent iCIMS from fully restoring Subscriber’s iCIMS Talent Cloud to an uncorrupted state.
Subscriber understands, acknowledges and agrees that use of unsecure FTP channels reduces the security measures in place to protect the Subscriber Data being transferred. As such, if Subscriber chooses to use unsecure FTP channels to transfer Subscriber Data to or from iCIMS, Subscriber shall add PGP encryption to all Subscriber Data prior to transferring such Subscriber Data via an unsecure FTP channel.
Subscriber understands, acknowledges and agrees that Subscriber’s use of unsecure FTP channels or other third-party providers (e.g., GoogleDrive, Box, or any other similar service) to transfer, import or export Subscriber Data to or from iCIMS will be at Subscriber’s own risk, and Subscriber further acknowledges and agrees that iCIMS shall have no liability of any kind whatsoever arising out of or in connection with Subscriber’s use of the foregoing.

