Overview
iForms are electronic forms used to collect data in iCIMS Applicant Tracking (ATS) and iCIMS Onboarding. These forms can be configured to mimic existing paper forms that you may already use at your organization. For general information on iForms, review the
Introduction to iForms article.
Acknowledgement iForms are a type of custom form that contain only informational text and an electronic checkbox at the bottom. Common examples of acknowledgment iForms include receipt of company handbooks and receipt of company policy forms.
While most iForms must be created and managed by iCIMS staff, user admins can create and manage acknowledgement iForms directly in the system, as described in the following sections:
Creating Acknowledgement iForms
User admins can create acknowledgement iForms by following the steps below.
- In iCIMS ATS, navigate to Admin > iForms > Create/Manage iForms. The Manage Forms page displays.
- Select Create iForm in the upper right corner. The Create iForm popup displays.
- Enter a name for the iForm into the iForm ID field. Select Create. The Edit Views (Form ID) page displays with the Views tab open to the Web View.
- Note: An iForm ID can only contain letters or numbers with an underscore.
- Optional: Below the text editor field, use the Branding To Use dropdown menu to select the appropriate branding option for this iForm.
- Note: This setting applies only to iForms sent individually via email; iForms presented within an application or onboarding process display with the branding settings for that process. Only the branding options set for portals are available to select here.
- Replace the text Acknowledgement Title with the iForm title as you want it to display at the beginning of the iForm.
- Replace the lorem ipsum text with the iForm text, formatting as desired using the What You See Is What You Get (WYSIWYG) tool.
- Optional: If needed, replace the text Employee’s Signature with the appropriate label for the acknowledgement checkbox at the bottom of the form (e.g., Employee Acknowledgement).
- When you have completed your updates, or when you are ready to preview your updates so far, select Save in the upper right corner.
- Optional: Select Web Preview, Mobile Preview, or Preview the Word View to preview how your iForm displays in each of those media.
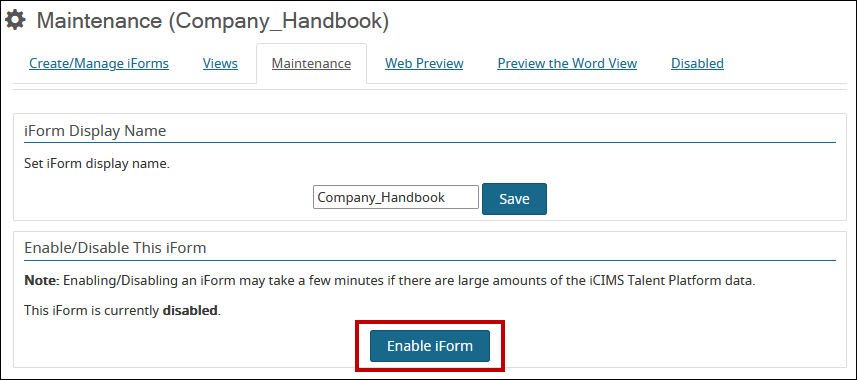
- When you are ready to enable your iForm, select the Disabled tab. The Maintenance (Form ID) page displays. Select Enable iForm to enable your iForm for use.
- Notes:
- Once you select Enable iForm, the name of the tab changes to Enabled and the button label changes to Disable iForm. Selecting the Disable iForm button disables the iForm from being used, changes the tab name back to Disabled, and changes the button label back to Enable iForm.
- You can also update the iForm Display Name from this page by editing the contents of that text field.
- When you are done editing and have saved your work, select the Create/Manage iForms tab to return to the Manage Forms page and a list of your existing iForms.
Managing Acknowledgement iForms
User admins can choose to manage existing acknowledgement iForms by editing iForm text, enabling or disabling iForms, and previewing iForms all from the Manage Forms page as described in the sections below.
Editing Acknowledgement iForms
User admins can edit an existing acknowledgement iForm by navigating to the Manage Forms page (
Admin > iForms > Create/Manage iForms).
To edit the applicable acknowledgment iForm’s text, under the Edit column, select Views. The Edit Views (Form ID) page displays.
Edit as desired using the WYSIWYG tool. Different versions of the acknowledgment iForm can also be accessed through the Version dropdown menu. If desired, select Web Preview, Mobile Preview, or Preview the Word View to preview how your iForm displays in each of those media before saving your edits.
Enabling or Disabling Acknowledgment iForms
User admins can enable acknowledgement iForms to be used or disable them from use from the Manage Forms page (
Admin > iForms > Create/Manage iForms).
To enable or disable an acknowledgement iForm, under the Edit column, select Maintenance. The Maintenance (Form ID) page displays.
As applicable, select Disable iForm or Enable iForm. Select the Create/Manage iForms tab to return to the Manage Forms page and a list of your existing iForms.
Previewing Existing Acknowledgment iForms
Users admins can choose to preview existing acknowledgment iForms from the Manage Forms page (Admin > iForms > Create/Manage iForms).
Under the Preview column, select the desired preview format (Web, HTML, or Word) from the end of the row. A new page opens with the preview.

